You can also view this post on Medium.
In most of the cases, automation of penetration tests, especially web application ones, is easy. Throw in some requests into Intruder or Scanner in Burp Suite and watch the magic happen. Burp will take care of the ever changing cookies and the requests’ updates to hold on to the session.
Even if the tested web application makes it hard to maintain the session once it’s established, this is not really a problem. Although a little trickier to do than one-click Active Scan we’re all accustomed to, session handling rules are there to help.
Let’s make the application even more irritating. Let’s make it a REST API used by some client (it could be a thick client, it could be a mobile app etc.).
To use the API, we will have to authenticate. All requests will have to supply a valid Authorization header and a one-time access token. Generated within that client application and provided as a standalone script for testing purposes*. That means that for automated testing, we need to:
- Automate Authorization header generation by getting the value from the API response
- Automate one-time access token generation by getting the value from the script and somehow putting that in our HTTP requests.
Let’s tackle that one by one.
*Real life use-case? Suppose you’ve managed to guess/reverse engineer the code generator and you hack yourself a standalone generator.
Authorization token
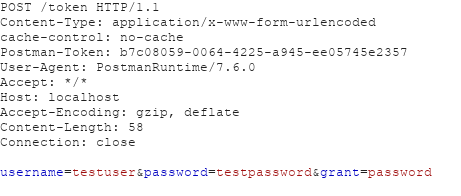
We ask the server for a token with a valid username and a password. In response, we receive the authorization_token value. It’s the information that will be used to prove that we are authorized to use the API.

In return, we receive the token in JSON:
{"authorization_token":"Cf0LOpa_Zc8Cf0LOpab5U8we9FAGDa4ucEbly2HwZzZIJtXGdW-1N5Upyq4NhdzXy1YmFlsftB5t2xzDOmOfVMBrr0gNvKWzNseDMFvRg_3fqcZyXF907tG61DoWKxNgv_GC4Vk2wlp9EVHOFFOSFA_8MU9qAJ0IqNVZqhDhbo4zkdvJsNyE9Yu-ZmxC_N7ulDhYYLpgG0utbLulul51VeWzUlGymGpRdRClkfnDW10GFhucEbly2HwZzZIJtXGoQPMbMA-jqXg5AphZ9bKA3b","token_type":"bearer","expires":3599}
First of all, the authorization token lasts only an hour. That means that if our tests take longer, it will have to be recreated. Secondly, we need to send that token along with all the other requests. No one wants changing their headers by hand every hour. Fortunately, here we come to the first part of our pentest automation.
We could do it using Burp and its macros*, but when dealing with an API, it’s always a good choice to use Postman — an API development environment. It’s common for the clients to hand out Postman-ready files with all the requests already defined and ready to be fired. So without further ado, let’s make Postman extract the authorization token from the response and use it in all the subsequent requests.
*We will tackle this in one of the later posts anyway.
Create an environment and a variable
Creating an environment and keeping all your variables in one place is a good habit, especially if working with DEV, UAT and PROD environments of the same project.
In the upper right corner of our Postman project we have an environment section, with a gear icon right next to it.

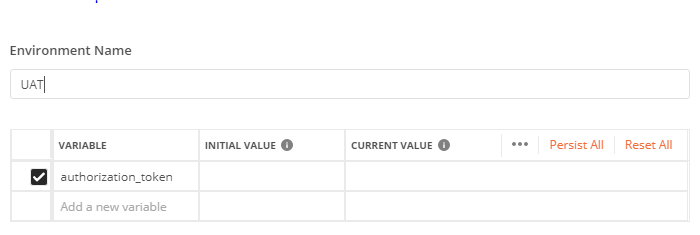
Creating a new environment = clicking the gear icon and adding a new one. To be consistent with the naming scheme of the response we got from the server, we name the variable authorization_token.

Change the value of the variable
Now the fun part, getting the variable value to be set every time we receive it in the response. For that, we will use the Test settings of the request. Since the data is in JSON format and that can be easily parsed, we need to get the authorization_token value from the response and save it to the environment variable.

Now every time that request is sent, Postman will save the returned authorization_token variable into the environment for a later use.
Send the variable in the requests
The last part is sending the variable with all the subsequent requests that need it. We set this as Authorization: bearer header. Now the only thing that’s left is supplying the variable into the correct place with the curly brackets.

We can confirm that it’s working by proxying the requests with Burp Suite. The Authorization header is filled with the proper authorization_token and it will keep changing every time a new token is generated.

What’s next?
Did you notice the Access-Token header that is sent with the request? That is another thing that is needed by the API and we’ll automate it in the next part using Python and Burp Extended Macros add-on. I’ll also show a use-case for default Burp macros and explain why in this case that couldn’t be used.